Germinating cannabis seeds is the first crucial step in cultivating your own cannabis plants. This process involves awakening the dormant seed, allowing it to sprout and begin its growth journey. With the right techniques and conditions, growers can ensure a high success rate and set the stage for healthy plant development. The article ‘Germinating Cannabis Seeds’ delves into various methods and considerations for successfully germinating cannabis seeds, from selecting the best seeds to the careful transfer to the growing medium.
Key Takeaways
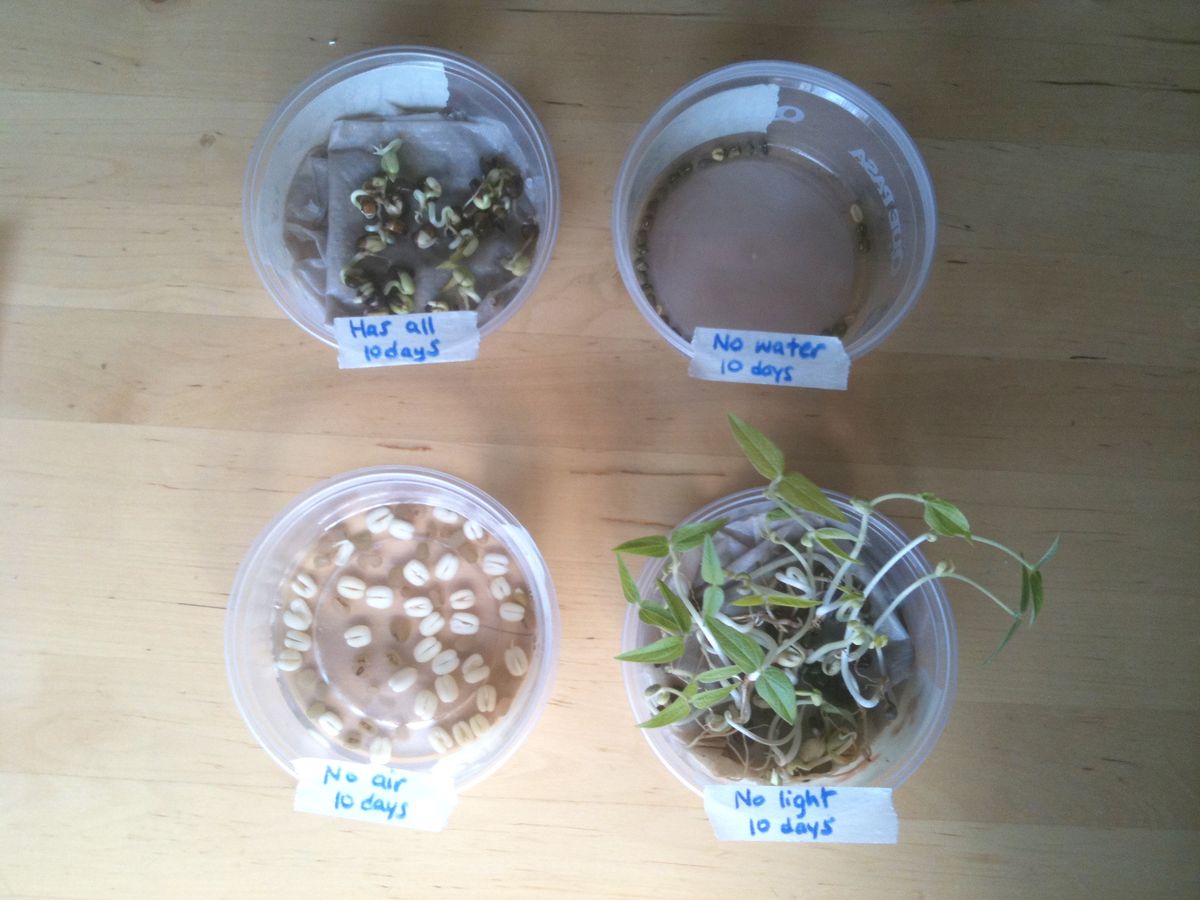
- Successful germination of cannabis seeds requires moisture, warmth, and oxygen, with methods such as soaking in water or using a damp paper towel to encourage sprouting.
- Careful handling during the transfer of germinated seeds to the growing medium is crucial to avoid damaging the delicate taproot and ensure optimal growth.
- Regulating temperature, light exposure, and water levels, as well as providing adequate ventilation, are essential for the health and success of germinating seeds.
- When shipping cannabis seeds, maintaining the right temperature and moisture balance is key to preserving their viability during transit.
- Protecting germinated seeds from light is important until they emerge, at which point they require light to grow, necessitating a strategic approach to light introduction.
Cracking the Code: The Art of Germinating Cannabis Seeds

Choosing Your Champion Seeds
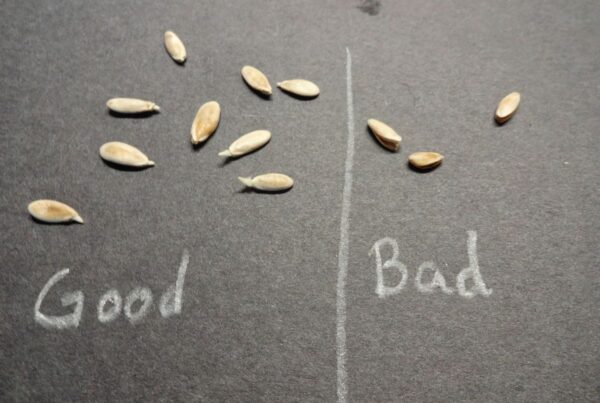
Alright folks, let’s get down to the nitty-gritty of picking the seeds that’ll make your friends green with envy. Choosing the right seeds is like picking your fantasy football team – you gotta have a strategy. You want seeds that look healthy and robust, not like they’ve been on a diet. Here’s a quick rundown of what to look for:
- Color: Aim for a nice, earthy brown with a hint of tiger-striping. Green seeds? Back in the bag, they go!
- Texture: You want your seeds to have a smooth, waxy coating. If it feels like a tiny pebble, you’re on the right track.
- Size and Shape: Bigger isn’t always better, but you do want a seed that’s full and symmetrical.
Remember, the genetics of your seeds are the blueprint of your future plants. Treat ’em right, and they’ll treat you to some top-shelf greenery.
Now, I’ve been at this game for a good while, and I’ve seen seeds that could win beauty contests and others that look like they’ve been through the wringer. Trust me, you don’t want to waste your time on the runts. If you’re in Oklahoma, swing by my shop, and I’ll show you the cream of the crop. We’ve got seeds that’ll thrive in our wild weather, and I’ll even throw in some growin’ tips. Happy planting!
The Soak and Wait Technique
Alright, folks, let’s dive into the soak and wait game. It’s like a first date for your seeds – you want to make a good impression, but you don’t wanna come on too strong. Keep things moist but not soaking, just like a perfect handshake. You’re aiming to get those little champions to sink to the bottom of the glass, signaling they’re ready for the big leagues.
Here’s the play-by-play:
- Soak your seeds in warm water, but keep it cozy, not hot tub level.
- Give ’em a good 12 to 24 hours of soaking. It’s like a spa day for seeds.
- Keep an eagle eye on ’em. If they’re still floating after a day, they might just be benchwarmers.
Remember, it’s a delicate balance. Too much water and you’re setting up a moldy disaster. Too little, and your seeds will be as parched as a tumbleweed in July.
Once they’ve sunk, and you’ve given them a standing ovation, it’s time to move them onto a moist paper towel or a cotton pad. But hey, don’t rush this step. It’s a dance, not a mosh pit. You’ve got to be gentle, like you’re handling a newborn chick or your grandma’s fine china.
The Paper Towel Method: A Cultivator’s Classic
Alright folks, let’s talk about the next step after you’ve played mother hen with the paper towel method. Transferring those little green babies to their first home is a bit like a delicate dance. You’ve gotta be gentle, yet precise, like you’re waltzing with a partner made of glass.
- First off, make sure your hands are clean – we’re not making mud pies here.
- Gently pick up the seed with a pair of tweezers (or your fingertips if you’re confident in your gentle touch).
- Make a small hole in the soil – no deeper than a half-inch. We’re planting seeds, not treasure.
- Carefully place the seed in the hole, taproot down, and cover it with a light sprinkle of soil.
Remember, these seeds are just waking up from their cozy paper towel slumber. They’re vulnerable and need a soft touch. No roughhousing!
Keep an eye on ’em, maintain a consistent moisture level, and before you know it, you’ll be seeing the first signs of life. It’s like watching your kids take their first steps, except these kids will eventually make you some money!
Transferring to the Medium: A Delicate Dance
Alright folks, let’s get down to the nitty-gritty of moving those tiny green babies to their new home. It’s like a dance, you see, where you’ve gotta be as gentle as a butterfly with a sore foot. Once that main root hits the half-inch mark, it’s showtime. But remember, no heavy stuff – I’m talking nutrients and fertilizers – for the first three weeks. Those little sprouts are more delicate than my Aunt Edna’s china plates.
Here’s a quick rundown on how to make the move smooth as butter:
- Wet your medium, be it soil or another choice, just enough to make it feel like a fresh slice of chocolate cake – moist but not soggy.
- Make a small hole, just the right size for the root to feel snug as a bug.
- Carefully place your seedling in the hole, and whisper sweet nothings as you cover the root with soil.
Remember, it’s all about the TLC. Too much love and you’ll drown ’em, too little and they’ll feel lonelier than a cowboy at a vegan potluck.
And if you’re thinking about skipping the paper towel method and going straight to soil, well, that’s like choosing to walk instead of taking the bus. It’s more work, but you get to enjoy the scenery. Just make sure you’ve got that good, healthy loose soil that makes your seeds want to kick off their shoes and stay awhile.
Until next time, keep it green and serene!
From Soak to Soil: The Seedling’s Journey

Timing is Everything: The Soaking Stopwatch
Alright folks, let’s talk about the ticking clock of germination. Timing is crucial when you’re soaking those precious seeds. It’s like brewing a perfect cup of coffee; too little time and it’s weak, too much and you’ve got a bitter mess. Here’s the lowdown on soaking your seeds just right:
- Step 1: Start with warm water, not too hot, not too cold. Goldilocks style.
- Step 2: Drop your seeds in and give ’em a good soak. Keep an eye on the clock!
- Step 3: After about 8 hours, check if any of the little fellas have popped. That’s your cue they’re ready for the next step.
- Step 4: If you see a root peeking out, it’s time to move them to their new home – the growing medium.
Remember, some seeds might be party poopers and take their sweet time. If they haven’t sprouted after 24 hours, reset that timer and give ’em another day. But don’t let ’em lounge in that bath for too long, or you’ll be dealing with a moldy situation.
Keep your seeds separate if you’re working with different strains. You don’t want to mix up your Sativa with your Indica and end up with a surprise salad.
And hey, if you’re getting mixed results with seeds from the same batch, don’t sweat it. Nature’s quirky like that. Just plant the stragglers directly in the soil and they’ll catch up. Trust me, I’ve been doing this for over two decades, and patience mixed with a bit of humor goes a long way in this business.
Creating the Perfect Humidity Haven
Alright folks, let’s talk about turning your seed-starting setup into a tropical paradise for those precious little cannabis seeds. Humidity is your best bud when it comes to germination, and getting it just right can mean the difference between a sprout party and a no-show.
First off, grab yourself a spray bottle or, if you’re feeling fancy, a hose with a mist setting. This will be your go-to tool for keeping the soil surface just the right kind of moist. Now, you don’t need a high-tech setup to maintain that perfect humidity level. A simple DIY solution like a clear plastic bag or some food wrap over your container can work wonders. Just think of it as a mini greenhouse for your green babies.
Remember, your seeds are like Goldilocks – they don’t want too much or too little of anything. So, here’s a quick checklist to keep you on track:
- Good and Healthy Loose Soil
- The Right Container
- Quality Water
- Humidity Dome or a DIY Humidity Maintenance Setup
- Know The Correct pH Levels of Your Water and Soil
- A Thermometer To Check The Environmental Temperature
- Stick Tags To Remind You What is What
Keep an eye on that thermometer and hygrometer if you’ve got ’em, but don’t sweat it if you don’t. Nature’s got a way of working things out, and a little bit of attention goes a long way.
And hey, don’t forget to use tweezers when planting those seeds. Treat ’em with the same care you’d give a fragile treasure, because, well, they are. Once they’re nestled in, mist the surface gently and cover up to preserve that sweet, sweet humidity. Aim for a cozy 70-90% – it’s like a spa day for seeds!
The Big Move: Planting Your Pioneers
Alright folks, it’s time for the big leagues – planting your germinated cannabis seeds. You’ve got them to crack and show their taproot, and now it’s like moving your kids into college; you want to do it right, but you can’t hold their hand forever.
Here’s a quick rundown to make sure your green babies get the best start:
- Step 1: Get your supplies in order. You’ll need a gentle touch and a heart full of hope.
- Step 2: Prepare the soil like you’re tucking in a toddler – soft and cozy.
- Step 3: Make a hole for each seed. Not too deep, just a cozy nook about 1cm down.
- Step 4: Place your seed gently into its new home. Think of it as a tiny high-five to Mother Nature.
- Step 5: Cover the hole with soil like you’re laying a blanket over a sleeping baby.
Remember, it’s not just about dropping them in the dirt; it’s about setting them up for success. A little love goes a long way.
And hey, keep an eye on them, but don’t be a helicopter parent. These little pioneers need some space to stretch their roots. Until next time, keep growing higher and higher!
The Do’s and Don’ts of Seed Shipping

Temperature Troubles: Keeping Your Seeds Snug
Alright folks, let’s talk about keeping your little green babies cozy. You know, temperature can be a real stickler when it comes to seed storage. Too hot, and your seeds might think it’s time to sprout when it ain’t. Too cold, and they could end up in a deep freeze, never to wake up again. Aim for that sweet spot, just like Goldilocks, not too hot, not too cold.
Here’s a quick rundown on how to keep your seeds just right:
- Keep ’em dark: Like a good night’s sleep, seeds love the dark.
- Stay dry: Moisture is the enemy of longevity.
- Cool it down: Think of your seeds like a fine wine; they need a cool, stable environment.
Now, I’ve been at this game for a good while, and I’ve seen seeds stored in all kinds of wacky ways. But trust me, a stable temperature is key. You want to keep your seeds somewhere between 68-86°F (20-30°C), but if you can, shoot for that golden 75°F (24°C). It’s like a comfy sweater for your seeds.
Remember, your seeds are the start of something beautiful. Treat ’em right, and they’ll treat you to some fine greenery.
And hey, if you’re ever in doubt, just think about what makes you comfortable. Seeds are a lot like us; they don’t want to be sweating bullets or shivering their shells off. Keep it steady, and you’ll be on your way to a bountiful harvest.
Moisture Management: The Balancing Act
Alright folks, let’s talk about the tightrope walk of moisture management. It’s like trying to teach a cat to swim – possible, but you gotta know the tricks. Keep humidity levels in check to protect your seeds’ precious outer shell. Too much moisture and you might as well be sending them an invite to a pool party they ain’t ready for.
Here’s a little cheat sheet for ya:
- Have a spray bottle or other mist-making device handy for post-sowing moisture maintenance.
- Use a humidity dome or get crafty with a DIY setup using a clear plastic bag or food wrap.
- Remember, it’s a moisture marathon, not a sprint. Water should be like a good friend – present but not overwhelming.
And don’t forget, the pH levels of your water and soil are like the secret sauce to your success. Get those right, and you’re golden.
Keep the soil moist, but not soggy. Think of it as making the perfect cocktail – it’s all about the balance.
Remember, we’re not just growing plants here; we’re cultivating dreams. So, let’s keep those dreams alive with just the right sprinkle of H2O!
The Waiting Game: Patience is a Virtue
Alright folks, let’s talk about the waiting game. You’ve done your part, and now it’s time for Mother Nature to take the wheel. But let me tell you, she’s not one to be rushed. Patience is key when you’re waiting for those little green pioneers to show their faces. It’s like waiting for water to boil or the Sooners to win a game – the more you watch, the longer it seems to take.
Now, I’ve seen growers as antsy as a long-tailed cat in a room full of rocking chairs, but here’s the deal:
- DON’T go prodding around your seeds like they owe you money.
- DO keep an eye on the conditions, making sure they’re just right.
- And for Pete’s sake, DON’T panic if they don’t pop up overnight. Some seeds are like the best chili – they take their sweet time.
Remember, the fastest way to germinate seeds is by soaking them, but even then, they need their undisturbed beauty rest to sprout properly.
So, while you’re waiting, why not plan ahead? Make sure you’ve got everything lined up for when those seedlings do decide to grace us with their presence. And if some seeds decide to be stubborn, well, that’s just nature’s way of keeping things interesting. Keep your spirits high and your patience higher!
Lightproofing Your Sprouts: A Stealthy Approach

Why Darkness Matters: The Science of Stealth
Alright, folks, let’s talk turkey about keeping your baby cannabis plants in the dark. It’s like a game of hide and seek, and trust me, you want your seeds to be the champs at hiding. Keeping them in the dark is like telling them, ‘Hey, it’s time to hustle and find that light.’ It’s all about giving them a nudge to stretch their little plant legs and reach for the sun once they’re in the dirt.
Now, don’t get me wrong, light is like a power-up for these green babies once they’ve sprouted. But before that, it’s all about the cloak and dagger routine. You’ve got to protect your seeds from the world – that includes your nosy dog and that one friend who can’t help but touch everything. And remember, it’s not just about playing it cool with the light; temperature and moisture are part of this delicate dance too.
So here’s the skinny: keep your seeds snug as a bug in a rug, in a place that’s more bat cave than sunny beach. And when it’s time to transition to the limelight, do it gently. You’re not flipping on the stadium lights at a sleepover, you’re coaxing them into the spotlight.
To sum it up, here’s a quick checklist to keep your seeds happy in their stealth mode:
- Find a dark, cozy spot away from prying eyes and paws.
- Keep it cool, but not ‘snowman in the fridge’ cool.
- Dry as a bone, folks. Moisture is the enemy of chill seed vibes.
- When it’s go-time, introduce light like it’s a slow jam, not a rock concert.
The Great Reveal: Timing the Introduction of Light
Alright folks, let’s talk about flipping the switch on your little green babies. After keeping them in the dark, like a surprise birthday bash, it’s time for the great reveal. Now, don’t go blasting them with a Vegas light show right off the bat. We’re aiming for a gentle sunrise, not a solar flare.
Here’s the skinny on easing them into the limelight:
- Start with a soft, seedling-friendly light. Think of it as their first sippy cup, not a firehose.
- Gradually increase the exposure, like you’re turning up the volume on a killer tune, not jumping to the chorus.
- Stick to an 18/6 light schedule, that’s 18 hours of party time and 6 hours of beauty sleep.
Remember, your sprouts are like newborns, they need a steady rhythm to get their groove on. So keep it consistent, and they’ll be dancing in no time.
Now, I’ve been at this gig for a good while, and I’ve seen sprouts turn into showstoppers. But it all starts with that first peek of light. So take it slow, watch ’em grow, and before you know it, you’ll be the proud parent of some fine cannabis plants.
Wrapping It Up: The Seed of Success
Well, folks, we’ve navigated the sprouting saga of cannabis seeds together, and it’s been quite the trip! From the cozy soak in a water bath to the thrilling moment they crack open with a taproot waving ‘hello,’ we’ve covered the nitty-gritty of germination. Remember, these little green babies need your tender love and care—keep ’em warm, moist, and in the dark like a surprise birthday party. Whether you’re a seasoned grower or a curious green thumb, the journey from seed to sprout is nothing short of magical. So, keep those vibes high and your seedlings higher, and you’ll be on your way to a bountiful harvest. Happy planting, and may your garden be ever-green!
Frequently Asked Questions
What are the best conditions for germinating cannabis seeds?
Cannabis seeds require moisture, warmth, and oxygen to germinate. A temperature range of 70-90 degrees Fahrenheit and a high humidity environment of 70-90% are ideal. The seeds should be kept in a dark place until they sprout.
How long should I soak cannabis seeds before planting?
Soak the cannabis seeds for 14 to 18 hours in clean, room temperature water. Do not exceed this time to avoid damaging the seeds.
What is the paper towel method for germinating cannabis seeds?
The paper towel method involves placing cannabis seeds between moist paper towels and keeping them warm. Check regularly to ensure the paper towels remain moist. Seeds typically sprout within several days.
When should I transfer germinated cannabis seeds to the growing medium?
Transfer the seeds to the growing medium once the small white rootlet (the radicle) emerges from the seed shell. This indicates that the seed has germinated and is ready for planting.
Can I plant cannabis seeds directly into the soil without germinating first?
Yes, it’s possible to plant cannabis seeds directly into the soil, but germinating them first gives you more control over the process and is less stressful for the grower.
Why do I need to protect cannabis seeds from light during germination?
Light can harm the new roots of cannabis seeds during germination. It’s recommended to keep seeds in the dark until they emerge, at which point they require light to grow.


